Introduction
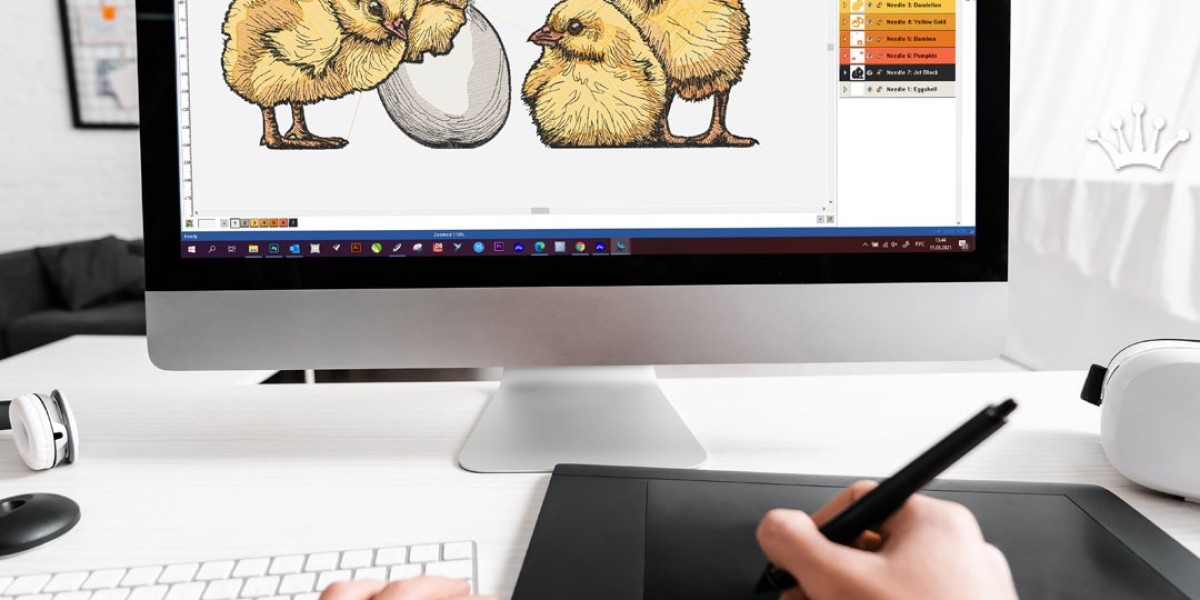
Ever looked at a stunning embroidered design and wondered how to create your own? Custom digitizing is the magic that turns artwork into stitch-perfect embroidery files. While professional digitizers make it look effortless, the process actually combines art and science in ways that might surprise you.
The good news? You don't need to be a tech wizard to learn digitizing. With the right approach and some practice, you can start creating custom designs sooner than you think. This guide will walk you through each step, explain key concepts in simple terms, and help you avoid common beginner mistakes.
Understanding the Basics
What is Digitizing?
Digitizing converts artwork into a language embroidery machines understand. It's like giving your machine GPS coordinates for every stitch.
Key Terms to Know:
Stitch Types (Satin, Fill, Running)
Density (Stitches per inch)
Underlay (Foundation stitches)
Pull Compensation (Adjusting for fabric stretch)
Software Options for Beginners:
SewArt (Great for auto-digitizing)
Embrilliance Essentials (User-friendly interface)
Hatch Digitizer (Free trial available)
Step 1: Preparing Your Artwork
Choosing the Right Image
Start with simple, high-contrast designs
Avoid photos with subtle shading
Clean logos work best for first projects
Image Editing Tips:
Use free tools like GIMP or Canva to:
Increase contrast
Remove backgrounds
Simplify complex areas
Size Matters:
Design should fit your hoop size
Remember: More detail = larger size needed
Step 2: Setting Up Your File
Software Setup Checklist:
Select correct machine format (PES, DST, etc.)
Set your hoop dimensions
Choose your fabric type (affects stitch settings)
Importing Your Image:
Use "File > Import" or drag-and-drop
Position artwork centrally
Lock the image layer to prevent accidental moves
Step 3: Creating Your Stitch Plan
The Three-Step Approach:
Outline First - Trace major shapes
Underlay Next - Add foundation stitches
Final Stitches Last - Build the visible design
Stitch Type Guide:
| Use Case | Best Stitch Type |
|---|---|
| Text/Outlines | Satin (3-5mm width) |
| Large Areas | Fill (zigzag pattern) |
| Fine Details | Running (single line) |
Step 4: Adjusting Stitch Settings
Density Recommendations:
Satin Stitches: 0.4mm spacing
Fill Stitches: 0.35mm for most fabrics
Delicate Fabrics: Reduce by 10-15%
Pull Compensation:
Add 10% extra stitches for stretchy fabrics
Compensates for fabric movement during stitching
Underlay Options:
Zigzag - Best for stability
Center Walk - Good for large fills
Contour - Perfect for curved shapes
Step 5: Testing and Refining
The Smart Testing Method:
Virtual Proof - Watch software simulation
Scrap Fabric Test - Stitch on similar material
Color Test - Check thread appearance
Common Fixes:
Gaps between stitches? Increase pull compensation
Fabric puckering? Reduce density
Thread breaks? Check tension and stitch length
Step 6: Saving and Exporting
File Format Guide:
Home Machines: PES, JEF, VIP
Commercial: DST, EXP
Universal: SVG (for vector editing)
Naming Convention Tip:
Use this format:
"DesignName_Size_StitchCount.format"
Example: "Sunflower_4x4_8500.pes"
Beginner Mistakes to Avoid
Skipping Underlay - Causes shifting and poor adhesion
Overcomplicating - Start with simple designs
Ignoring Fabric Type - Different materials need different settings
Rushing the Process - Good digitizing takes time
Practice Projects to Try
Build skills with these starter designs:
Basic Monogram (Learn satin stitches)
Simple Shape (Heart, star - practice fills)
Two-Color Logo (Master color changes)
When to Consider Professional Help
While learning is rewarding, sometimes it's better to hire a digitizer when:
You need complex designs quickly
Working with very small text (under 0.5")
Creating designs for commercial sale
Dealing with specialty fabrics like mesh
Resources to Continue Learning
Free Tutorials:
YouTube channels like "Embroidery Legacy"
Software manufacturer tutorials
Affordable Courses:
Udemy's "Embroidery Digitizing Basics"
Local maker space workshops
Practice Files:
Urban Threads (free designs to study)
EmbroideryDesigns.com (free samples)
Conclusion
Custom digitizing opens up a world of creative possibilities for your embroidery projects. While the learning curve might seem steep at first, breaking the process into manageable steps makes it approachable for beginners. Remember: every expert digitizer started where you are now.
Key takeaways:
Start simple and gradually increase complexity
Always test your designs before final projects
Be patient - skills develop with practice
Have fun experimenting with different techniques
What will you create first with your new digitizing skills? A personalized gift? Custom apparel? The only limit is your imagination!